For creators, that moment of inspiration is when they imagine their video but before all the action starts rolling, it is thrilling and challenging. Whatever method they end up using-whether it’s blogging, filmmaking, or social media influencing-they will need good tools that are flexible, powerful, and easy to apply while turning their scripts into reality. CapCut’s desktop video editor is the best free platform on which to do just that: converting ideas into scenes with far less fuss than most other programs.
Of all, CapCut provides users with one of the most handy functions while getting into action; it has a text to speech tool that transforms a script into narration without recording, so no need to worry about bringing a dialogue or voiceover to life. This article shows the process creators can undergo from script to screen using CapCut’s desktop editor-very exhaustive steps to make those visions come true.
Why Creators Love Video Creation with CapCut
CapCut Desktop is every creator’s dream since it enables the workflow from idea to execution. It lends itself to every part of video production, from raw ideas to polished output, thus becoming loveable for those who want control without stress.
Wherever there needs to be a test for flawless execution-from the most professional to almost amateurs-CapCut stays true to its name by implementing intuitive tools that allow seamless transformation of script into images and sounds.
Whichever way it swirls, CapCut opens itself to your creative whims- be it a skinny TikTok or some long-winded rant on YouTube.
Bringing Scripts to Life with CapCut’s AI Video Generator
CapCut’s AI video generator takes your script from words to visuals in minutes, creating a video draft from a simple text prompt, such as “Emotional travel story”, complete with effects and music. This is the fast lane from concept to creation-cuts down on the time you need for the fun parts of editing.
Jumpstart Your Vision
The AI video generator lays a framework derived from your script, thereby avoiding monotonous rigmarole and diving straight into polishing the narrative.
Adding the Creative Flair
After the AI makes the video, you get to modify it in CapCut’s desktop editor with your own footage or style to perfectly match your original vision.
Enhancing Narration with CapCut’s Voice Changer
Voice is primary to every script and capcuts voice changer will offer you myriad options to indulge or erupt your script into life. Be it a dramatic tone for a narrative or a quirky effect for a light-hearted skit, this tool brings depth and personality to your video.
Shaping Up the Sound of Your Story
A voice can add a unique spice to your script so that it doesn’t fall flat-the classic “deep” for seriousness, or “helium” for some levity.
Matching Voice to Mood
As simple as that, match the audio with the tone of the script-calm for reflection or high-octane for action-to keep the audience inside.
Turning Your Script into a Video Using CapCut Desktop Editor
With CapCut’s desktop editor in place, transitioning from an idea to an actual production becomes a much easier endeavor, replete with visuals and sounds to actually render the environment. Working from a storyboard or an idea, this guide will see you through to making a video that is a true manifestation of your idea. Here are the workings of it from setup to final cut, with extra attention to ensure that your creation shines.
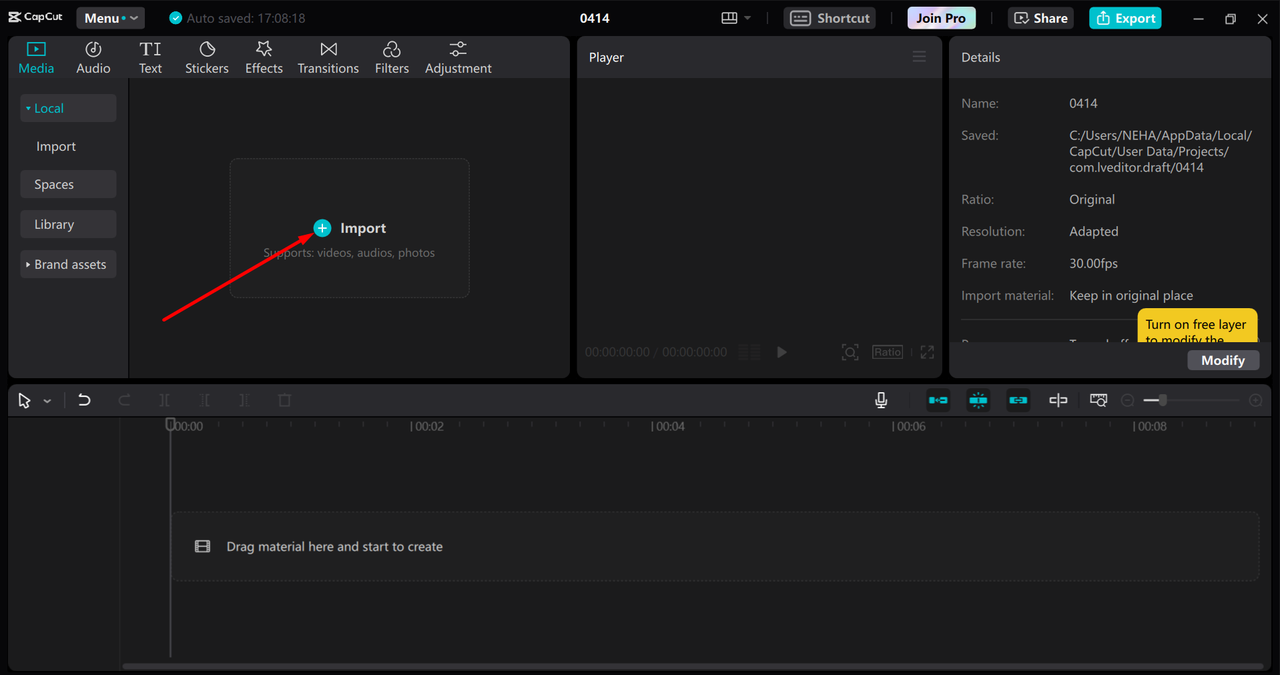
Import your video
Start at the official website and download CapCut desktop, installing it on either Windows or Mac. Next, it would be best to launch the app and click on “Create Project” on the opening screen. Import your assets by clicking “Import” near the top left, uploading your script clips, images, or music, and dragging them onto the timeline at the bottom where you will be building your sequence; take a moment to put it somewhat in order of your script to create a natural flow.
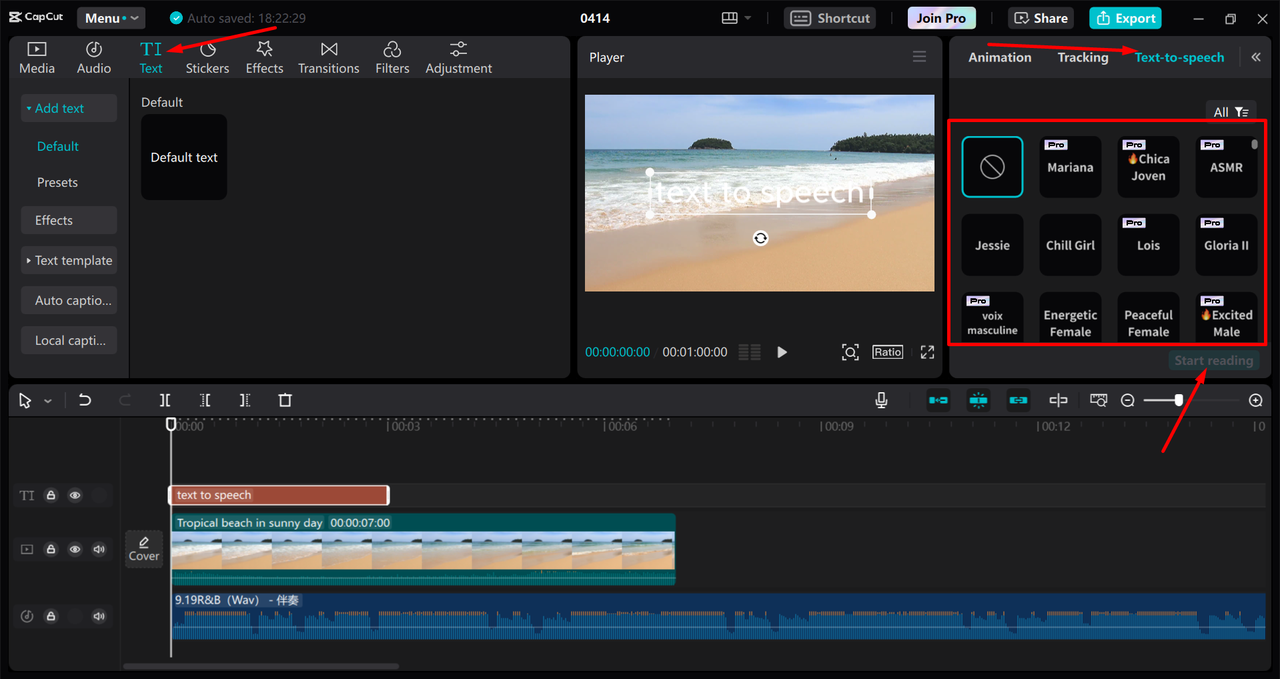
Customize your video
This is what provides a voice to your script: go to the “Text” tab at the left sidebar, select “Text-to-Speech,” type any line of your script, perhaps “And so the adventure began,” choose a voice that fits your context, and click on “Generate”; after that, drag the audio to the timeline and edit it to match just as precisely in time with the images as you can.
To make your audio a tad more interesting, select your track on the timeline, hit “Audio” from the top menu, choose “Voice Changer,” then select an effect from “Echo” or “Cartoon,” adjust pitch or speed to enhance mood, and apply effect after previewing it to fit your script’s feel.
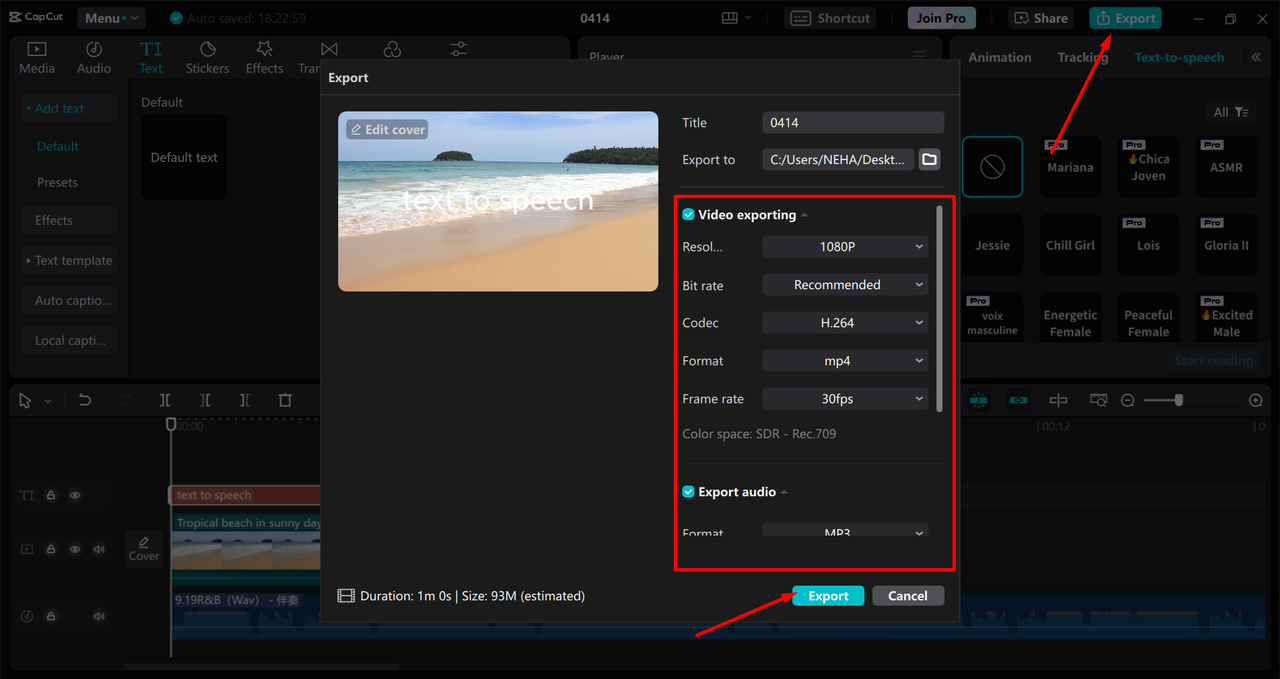
Export your video
Last, finishing touches should entail loading text overlays for dialogues and scene titles through “Text” and “Elements,” with plenty of font and placement adjustments for effect; using the play button that is placed above the graph will let you preview the video, make any additional amendments that might be deemed necessary, and move to “Export,” find the right-hand corner, choose a resolution of 1080p, and know the file is saved for the screens.
Some useful tips for using CapCut:
Write the Script First: Draft your video so edits can be focused.
Layer Sounds: Voice effects can be further enhanced with music.
Preview Often: Maintain pace in the video for text-to-video flow.
Conclusion
CapCut’s desktop editor serves as the perfect companion for creators, allowing them to transition from script to screen with text-to-speech, AI video generator, and voice changer. Follow the above process, play around with these features, and see your imagination come alive with spectacular videos. Download CapCut now and start making some jaw-dropping content!
Shredding documents is a common way to keep sensitive information safe. But, recycling shredded paper can be tricky. Not all recycling places can handle the…
We use cookies on our website to give you the most relevant experience by remembering your preferences and repeat visits. By clicking “Accept”, you consent to the use of ALL the cookies.
This website uses cookies to improve your experience while you navigate through the website. Out of these cookies, the cookies that are categorized as necessary are stored on your browser as they are essential for the working of basic functionalities of the website. We also use third-party cookies that help us analyze and understand how you use this website. These cookies will be stored in your browser only with your consent. You also have the option to opt-out of these cookies. But opting out of some of these cookies may have an effect on your browsing experience.
Necessary cookies are absolutely essential for the website to function properly. This category only includes cookies that ensures basic functionalities and security features of the website. These cookies do not store any personal information.
Any cookies that may not be particularly necessary for the website to function and is used specifically to collect user personal data via analytics, ads, other embedded contents are termed as non-necessary cookies. It is mandatory to procure user consent prior to running these cookies on your website.
We use cookies to ensure that we give you the best experience on our website. If you continue to use this site we will assume that you are happy with it.Ok